
 Tickets
 Parties
 Shop
Shop Directions
#87 June Status Report
June 7, 2014
This month we’ll look at some of techniques used by EnterTRAINment Junction (EJ) volunteers to upgrade the interior lighting in one of the largest and most complex buildings in the EJ layout’s Middle City, the Central Tool and Machine Company building.
The reasons this building was so difficult to light was that it was very large, had an unusual footprint (a very pointed triangle), had horizontally closely spaced windows, and had an unusual interior structure, all of which complicated the effective placement of the new interior lighting. Figure 1 shows the building before the upgrade. Like most Middle Period buildings its windows were frosted to help diffuse interior lighting, and several LED “bulb equivalents” provided some very limited lighting with the usual bright spots seen through a few of the many windows.
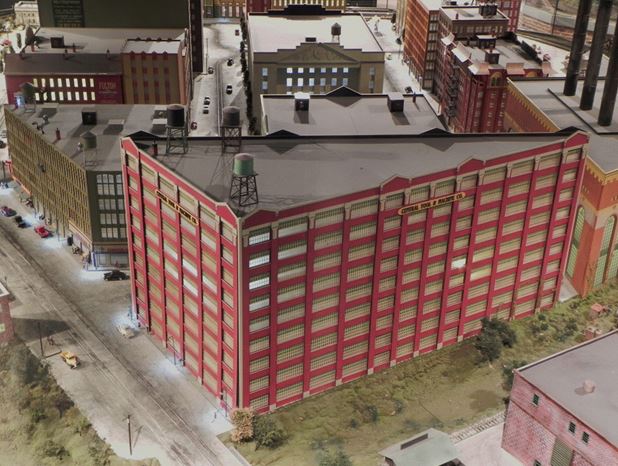
Figure 1. Central Tool and Machine Company Building before Lighting Upgrade
Figure 2 shows part of the interior with some of the structural features like the wide horizontal frames, the very pointed end of the building with its angle-setting gussets at the roof and under the lower frame, and the windows closely-spaced horizontally and fairly widely spaced vertically. The view also shows some of the features of the upgraded lighting whose details will be described in what follows. Note that the lighting strips are mounted horizontally on the frames to ensure that their mountings would not be visible as shadows through the windows. As is usual for most of the lighting upgrades, the lights point away from the windows toward white curtains, some of which reflect the light while others both reflect the light back toward the windows and transmit it through the curtain and out the windows on the opposite wall of the building. The curtains are made from freezer paper, which reflects most of the light but is also translucent enough to allow some of it to pass through. This provides a great way of diffusing the light and evenly spreading it from the concentrated light coming from the LEDs. (The curtains are actually bright white in color, even though this photo shows them a gray).
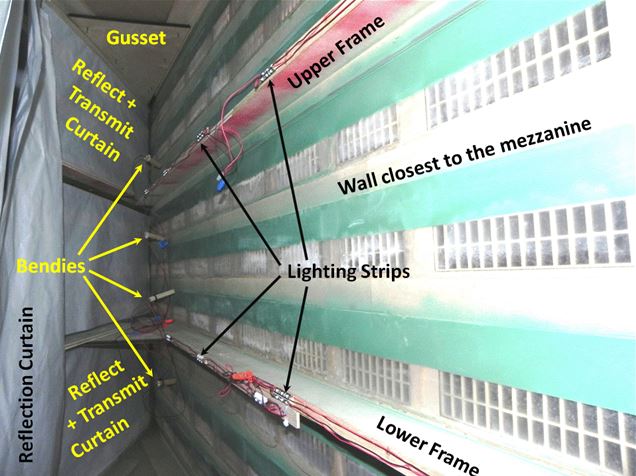
Figure 2. Interior of Central Tool and Machine Company Building
The lighting uses the three-LED strips, spaced about 10 inches apart horizontally; and, because of the wide frames and horizontal mounting, they are shimmed so that one set aims slightly upward and the other slightly downward to produce more even lighting of the curtains (Figure 3).
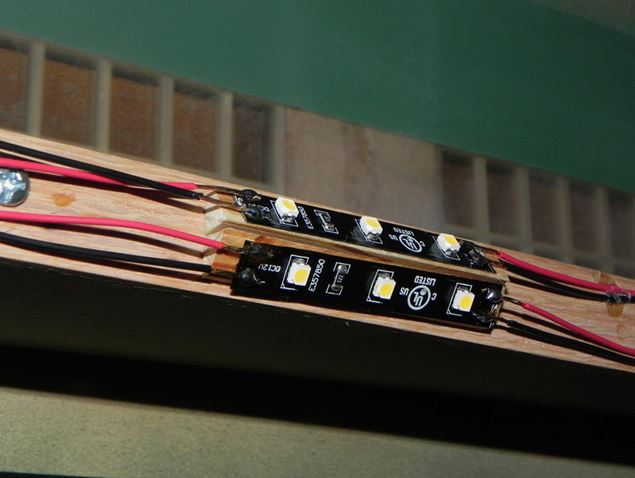
Figure 3 LED Light Strips Angled Up and Down to Spread the Light
To get the lighting into the corners of the building, some three-LED strips were attached to pieces of wood mounted on the end of bendable wire so that they could be specifically located and aimed at the area desired (Figure 4). We called these lights “bendies.” They’re reminiscent of the old “goose-neck” desk lamps some of us used a long time ago. Note that the bendies’ light strips are aimed into the corner of the building providing light above and below the gusset. This overcomes the problem of the gusset preventing much of the light from the horizontal frame-mounted strips from illuminating the sharp interior corner of the building. Also, note that the bendy lights are positioned at a height between the windows. This prevents the lights from being seen directly from outside the building from any locations accessible by EJ visitors.

Figure 4. Bendy Light Installation
The shape of the building brought with it some additional challenges for the effective mounting of the curtains. Figure 5 shows the methods used to distribute the light to the curtains so that it could be reflected and transmitted to and through the windows of the building. This scheme used a lot of the techniques learned from upgrading the lights in the other Middle City buildings.

Figure 5. Lighting and Curtain Installation View from Above
Finally, with the installation complete, you can see the results in the foreground of Figure 6.
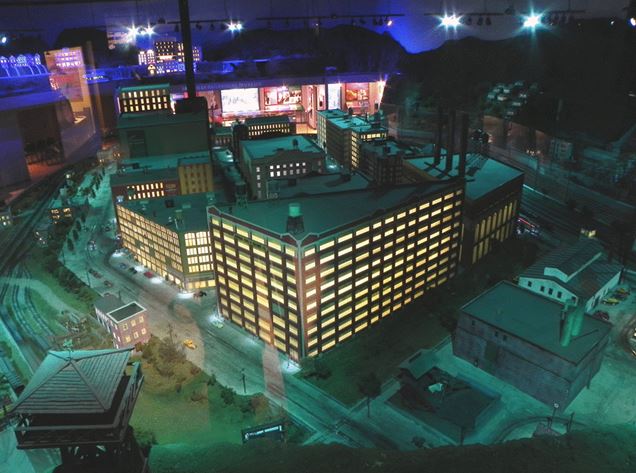
Figure 6. Lighting Upgrade Complete
Still far from complete, the lighting upgrades will continue until all the accessible and readily visible buildings have been modified.
© 2014 Tom Bartsch
MVGRS Big Train Project Coordinator