
 Tickets
 Parties
 Shop
Shop Directions
#78 September Status Report
September 14, 2013
The theme of this month’s report has got to be “fixing things left undone.” There are a lot of changes that have been made to the EnterTRAINment Junction (EJ) layout over the years. Most of them don’t happen instantaneously. This article looks at two features of the layout as examples of the continuous improvement philosophy that’s applied to the modeling on the layout.
The first example is part of the Coney Island model. A lot of the details of the model were added piecemeal as they were developed and perfected to the point that they were ready for display. The initial priority and focus was getting the major rides installed. Then it was modeling the major buildings and the details of the midway with its sculptured hedges and trees. Some models like the building housing the Cuddle-Up, Whip, and Dodge-Em rides (seen in Figure 1 behind the train station) and the games building (discussed in a previous article) had open sides, which demanded interior detail.
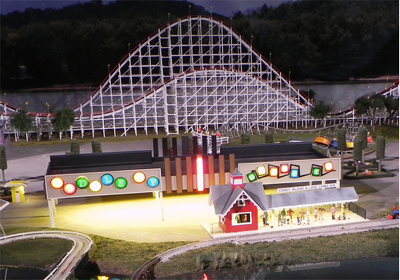
Figure 1. Before: Cuddle-Up, Whip, and Dodge-Em Rides Building
For the Cuddle-Up, Whip, and Dodge-Em, that interior detail was somewhat challenging and time consuming to construct, because it required replication of a number of items, each shaped the same as the others. As you can see in Figures 2 and 3 (seen on the workbench before installation), that replication was masterfully carried out by EJ’s volunteers. Installation occurred in a matter of weeks after the installation of the building (Figure 4). This one fixed what was left undone very quickly.
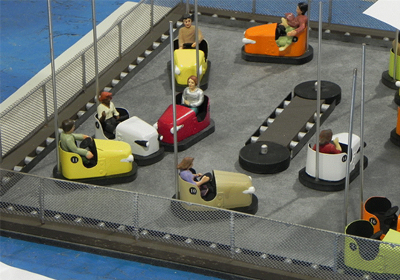
Figure 2. “Dodge-Em” Bumper Cars
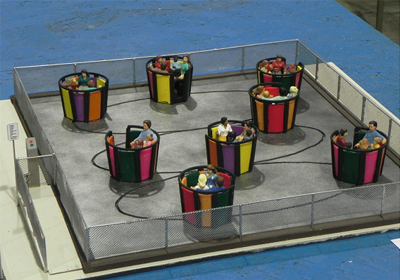
Figure 3. “Cuddle-Up”
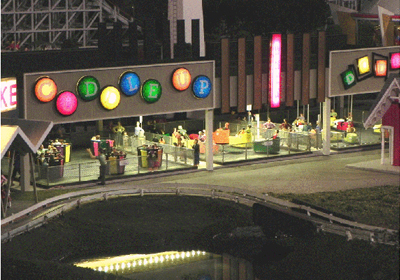
Figure 4. After: Cuddle-Up, Whip, and Dodge-Em
At the other end of the spectrum of timeliness was the Modern City’s parking structure. Haste to install it, its size, and the physical constraints of its location presented a very difficult challenge, overwhelming the planning needed to create a credible model. When installed in February 2011, it was left unfinished. Note the entrance to it shown in Figure 5. It has a set of gaping holes of missing siding and floors that abruptly end with no visible means for cars to get from ground level up to the upper floors. There may once have been the idea of putting ramps from one floor to the next in the vacant space, but there was really not enough room to put them in without the ramps being by far too steep to be believable. So the building remained unfinished until August 2013.
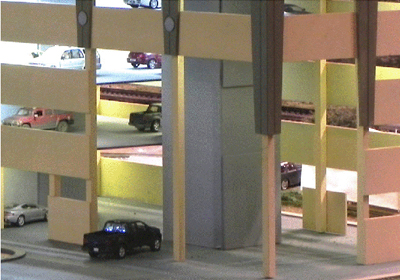
Figure 5. Before: Entrance to the Parking Structure
The solution was the brain child of the MVGRS volunteers, who had always been bothered by this obvious incomplete detail so close to the aisle, where it could hardly be missed by the customers. The solution to the problem was two side-by-side elevators (non-functioning, because it would be quite difficult to mechanize, especially in miniature). Each elevator would be a four-post design, with the platform raised by chains attached to the platform at each of its four corners, positioned and guided by tracks in each of the four posts. The two posts between the two elevators were shared, having tracks on both sides facing their respective elevators. One elevator would normally be for going up, the other for going down (though in an emergency, on or the other could be used for both going up and down). To keep cars from running into the “elevator shafts” or from driving off the platforms, yellow and black striped barriers with stop signs would block entry or exit, except when it was appropriate to enter or leave the elevator. A pair of barriers, one on each end of the elevator platform, would travel up and down with the platform. When it was appropriate to pass, the barriers would move up and out of the way.
Figures 6 shows a black car on the way up from the first floor in the right elevator and a silver SUV (barely visible in the center of the picture) entering the left elevator on the second floor.
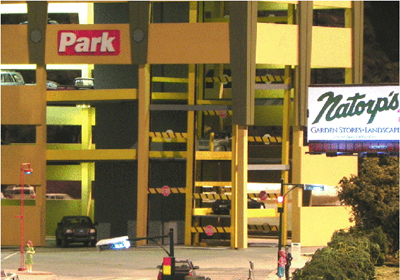
Figure 6. Parking Structure Elevators
Figure 7 shows a side view, again with the black car just starting up from the ground floor, and the silver SUV starting to drive onto the elevator platform from the second floor.
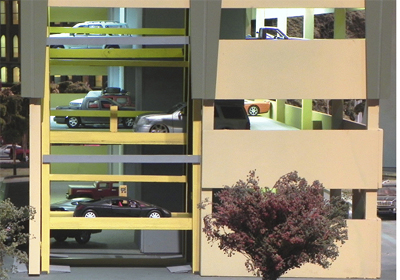
Figure 7. Parking Structure Elevator Details
And, as always, we’ll keep working to fix or finish what needs it, when we can.
© 2013 Tom Bartsch
MVGRS Big Train Project Coordinator